* Design and produce something with a digital process (incorporating computer aided design and manufacturing) not covered in another assignment, documenting the requirements that your assignment meets, and including everything necessary to reproduce it. Possibilities include but are not limited to wildcard week examples.
☑ Documented the workflow(s) and process(es) you used.
☑ Explained how your process is not covered on other assignments.
☑ Described problems encountered (if any) and how you fixed them.
☑ Explained the programming process(es) you used.
☑ Included original design files and source code.
☑ Included ‘hero shot’ of the result.
Learn about Embroidery work
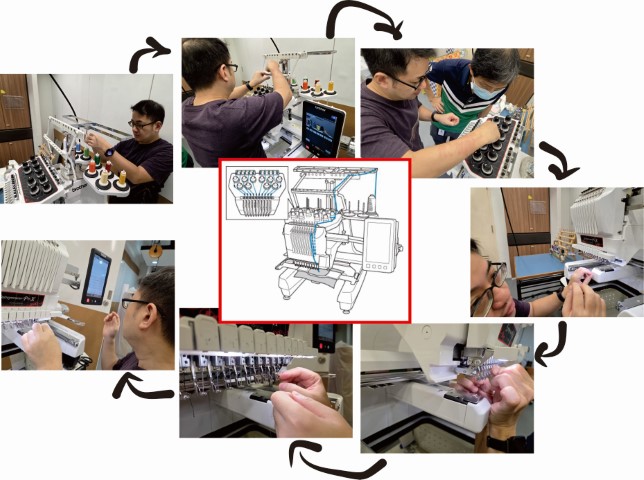
For this week’s wildcard assignment, my Fab Academy partner, Florimond Chu, and I decided to explore a new skill beyond what we’ve learned over the past 15 weeks: Embroidery. We worked with the Brother PR1055X 10-Needle Embroidery Machine.
Overview
Embroidery is the craft of decorating fabric or other materials using a needle to stitch thread or yarn. As one of the oldest forms of textile art, it dates back thousands of years and has been practiced across many cultures. Traditional stitches include the chain stitch, buttonhole stitch, running stitch, satin stitch, and cross stitch.
While modern embroidery still incorporates many of these classical techniques, machine embroidery has also introduced a range of new, digital stitch patterns.
Embroidery is commonly used to enhance garments, quilts, and accessories, often incorporating not only thread but also embellishments like beads, sequins, pearls, and quills for added texture and visual appeal. Today, embroidery serves both aesthetic and practical functions and is widely used in fashion design, cultural expression, and personalized gifts. Quote from Wikipedia - Embroidery
CHARACTERISTICS
• It makes 850 stitches per min (spm) (recommended)
• 260mm x 160mm embroidery area.
• It has 138 built-in embroidery designs.
• 11 styles lettering.
• Automatic needle threader.
• Automatic thread tension.
• Automatic thread cutter.
• Full-colour touch screen.
• Camera function.
• 10 needles.
• USB port.
WORKFLOW
We planned to have a 2-days session for this skill set learning lesson: Day 1 Lecture class and Day 2 Practical class.
On Day 1 – Lecture Class - Our instructor – Mr. Steven Chew was holding a class to brief us on the basics of what we need to know about embroidery.
1. The machine and consumables that we need.
Selected machine to use for my assignment: PR1055X 10 Needle Embroidery Machine
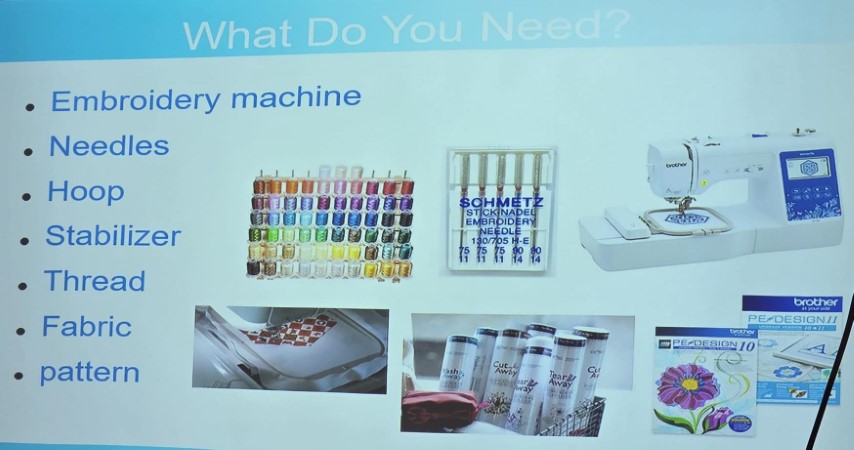
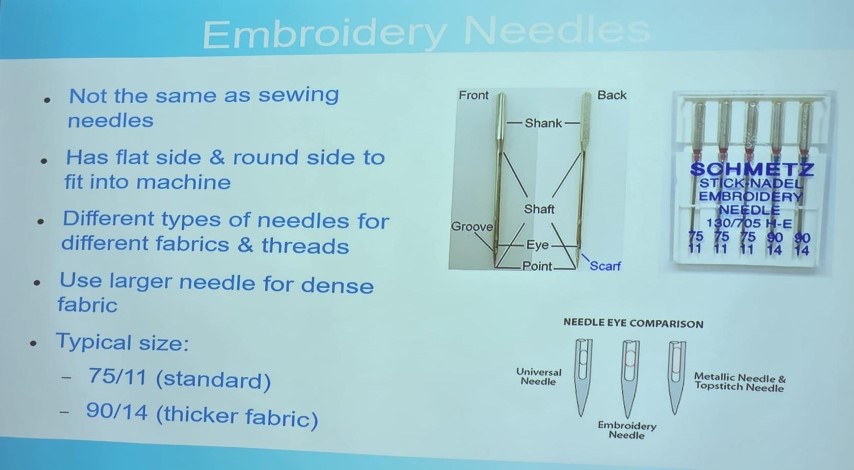
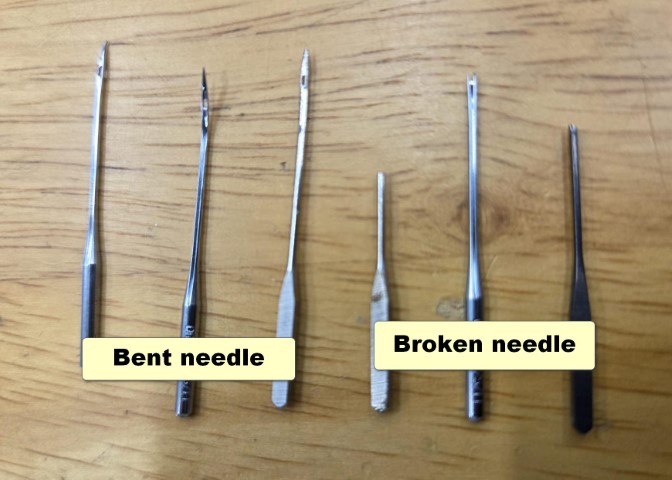
2. Embroidery needles, and some examples of broken needles.
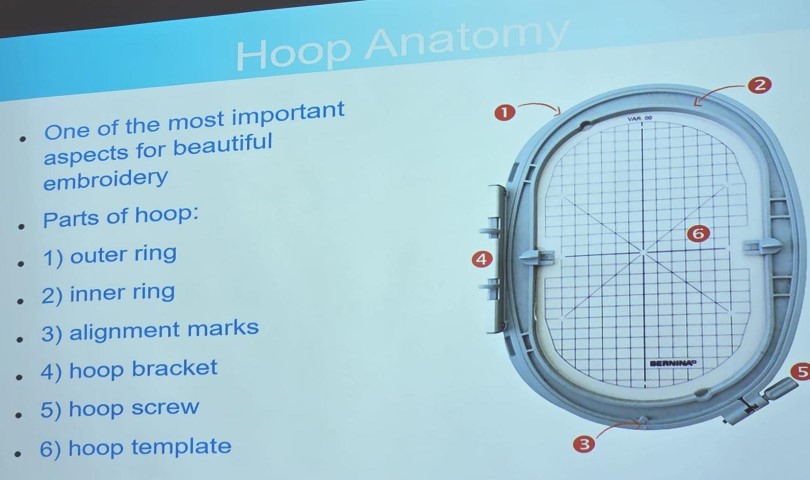
3. Hoop size and selection.
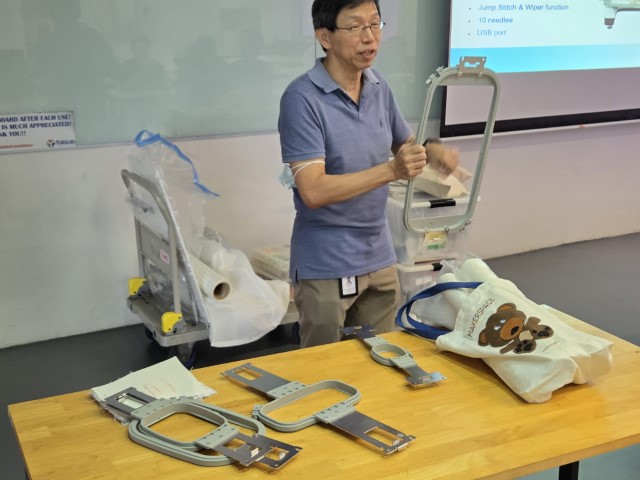
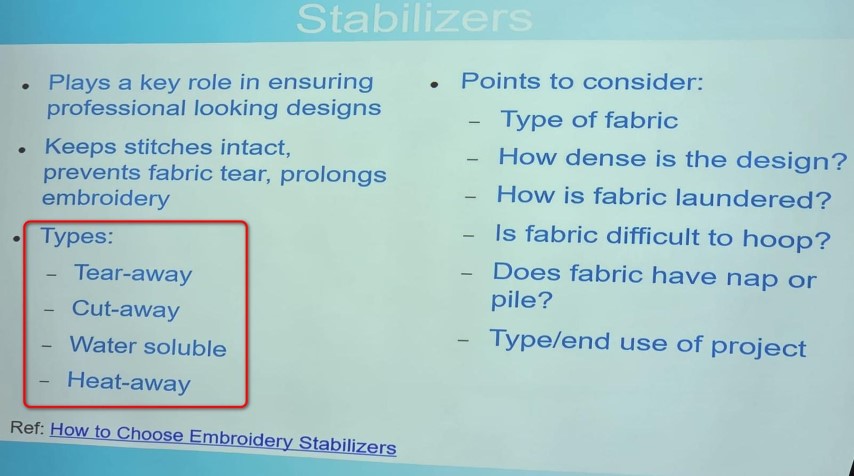
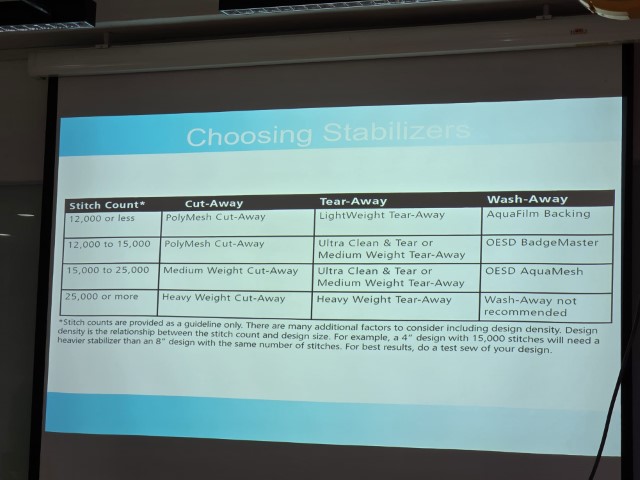
4. Type of stabilizers.
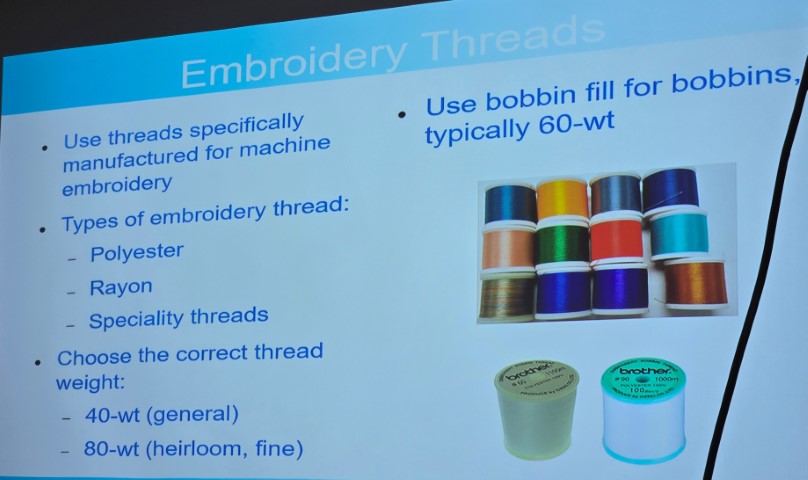
5. Embroidery threads.
6. Fabric selections.
* Cotton - Easy to stitch, affordable, widely available. Mainly use for beginners, hand embroidery and hoop art.
* Linen - Natural fibres, durable and have beautiful texture but it can be unevenly woven.
* Canvas - Use for needlepoint, tapestry or long stitch. It is a very stiff and supportive for dense stitching.
* Silk – It has luxurious sheen and very fine weave but expensive, delicate and slippery. Widely used for fine art embroidery, silk shading or goldwork.
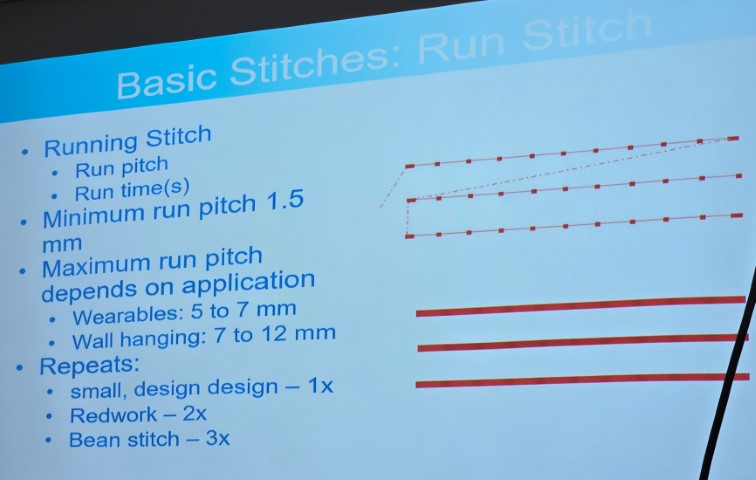
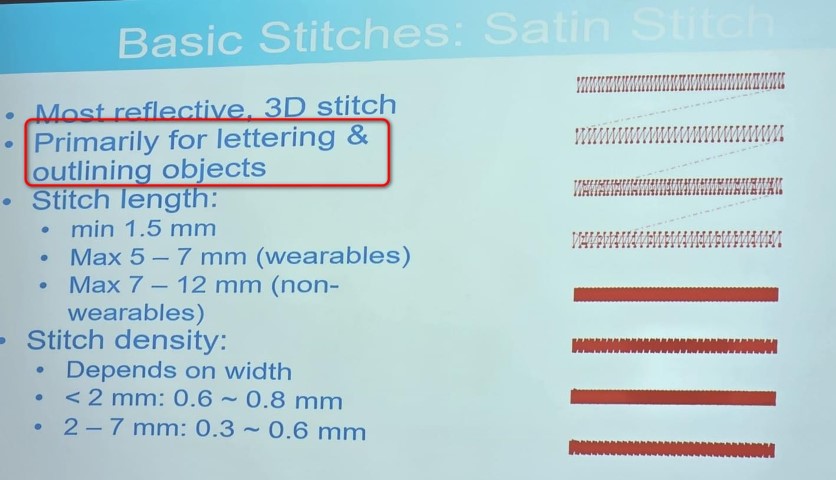
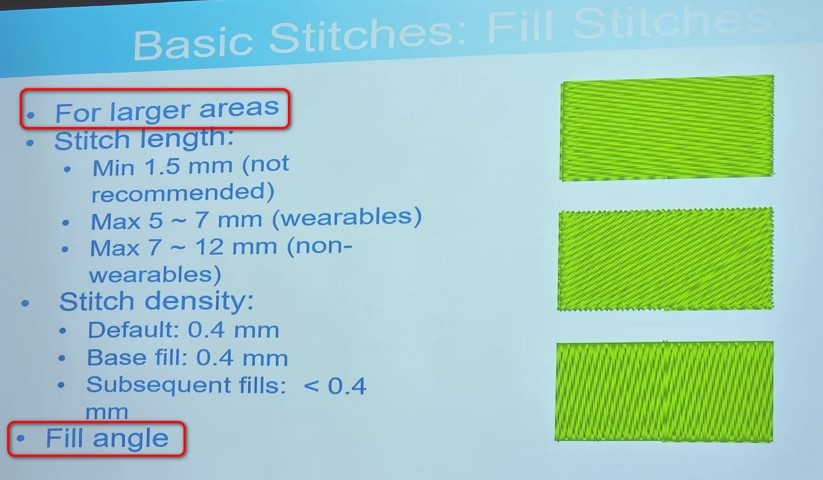
7. Stitch patterns.
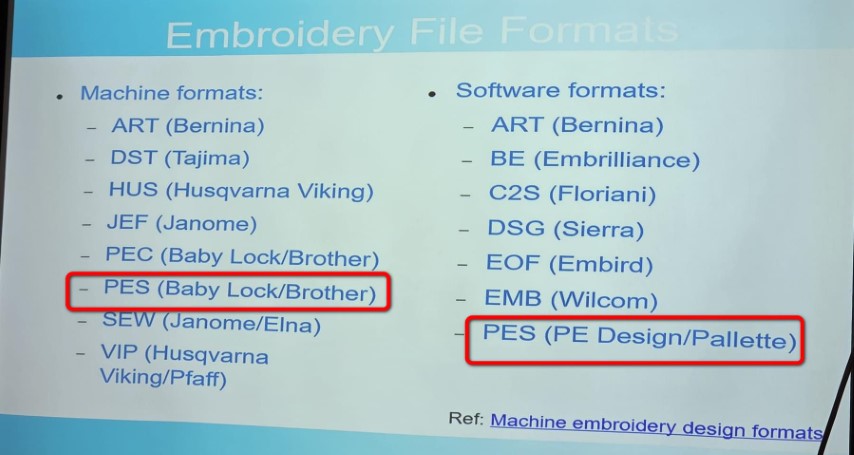
8. File Format and Software
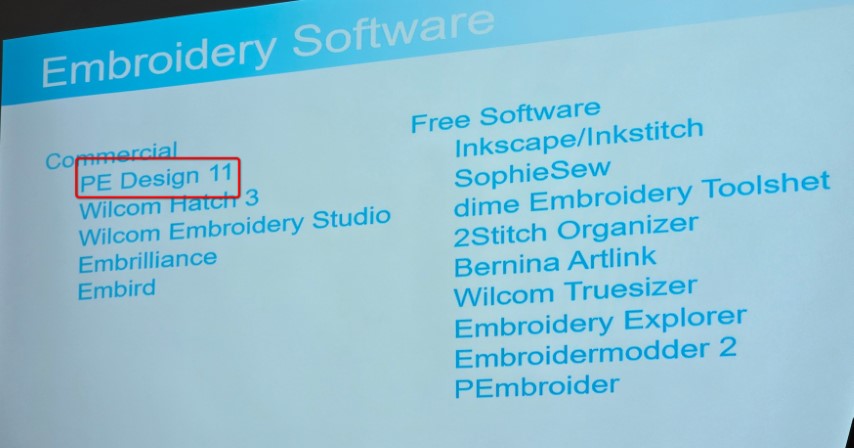
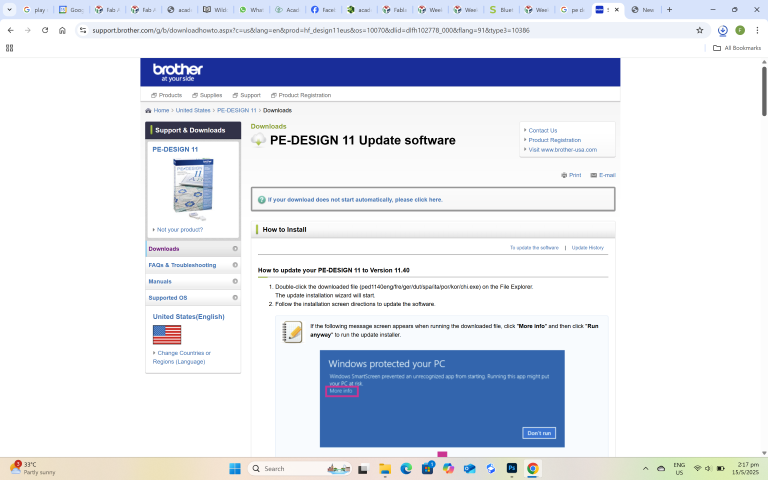
To begin, I needed to install the necessary software to create a design for the embroidery machine. The application I used — previously mentioned — is PE-DESIGN 11, which requires a hardware dongle to run.

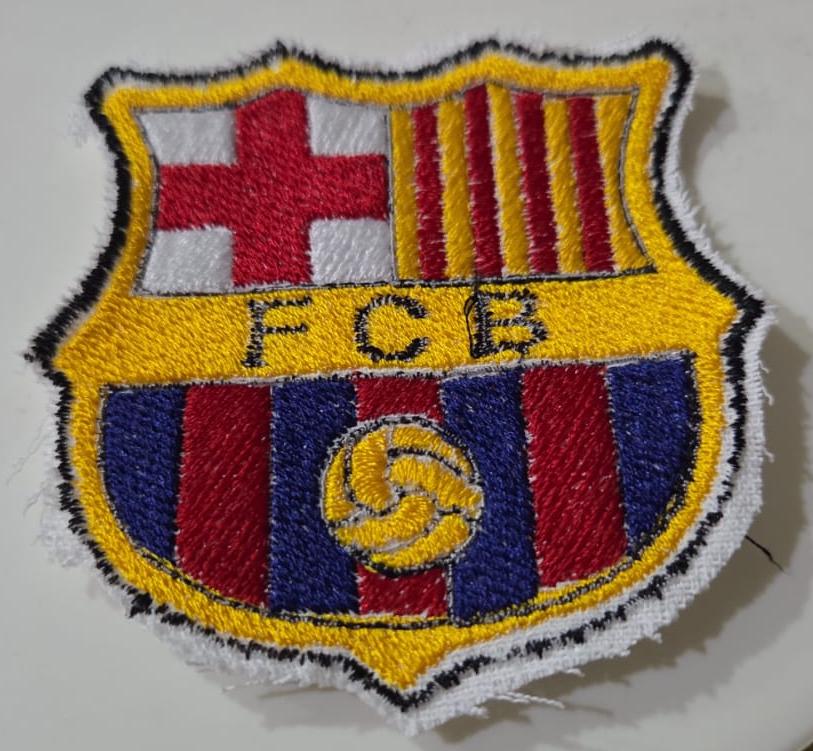
On the design setup screen, I prepared the image I intended to embroider: the FC Barcelona crest, which features five colors (I treat both BRIGHT and DULL yellow as one color).

I use INKSCAPE software to trace the PATH and remove the IMAGE file to remove the complexity of the file, then save as PLAIN SVG file format before starting the embroidery process.
Given its relatively "simple" layout, I expected the embroidery process to be manageable.
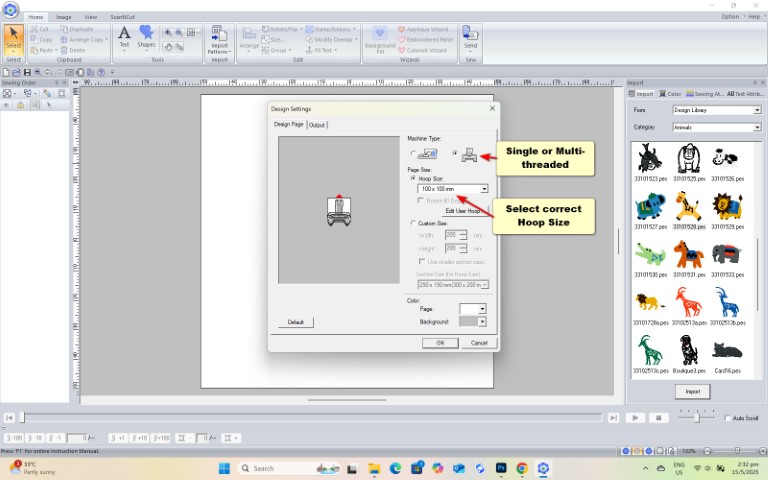
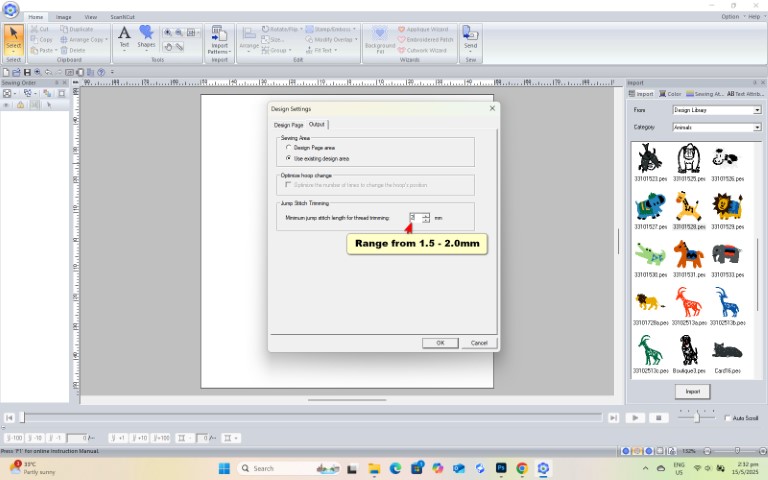
Using the software, I edited the image and adjusted the necessary embroidery parameters.
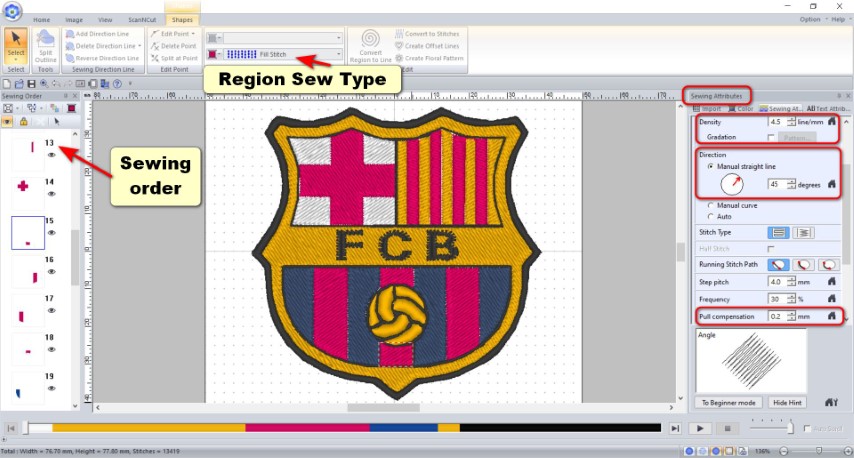
Key Considerations in the Setup:
• Sewing Order: Optimize the stitching sequence for efficiency and accuracy.
• Sewing Attributes:
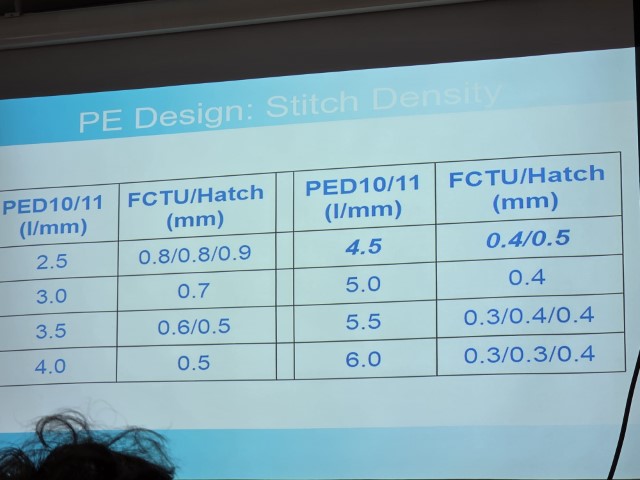
o Density: Set to 4.5 lines/mm (recommended).
o Direction: Vary stitch angles for adjacent elements to avoid overlap or distortion.
o Pull Compensation: A value between 0.1 mm and 0.2 mm works well for most fabrics.
• Region Sew Type: Choose the stitch type based on area size and desired texture.
After finalizing the design and stitch settings, I saved the project as a .PES file in preparation for the next day's hands-on session.
During the Day 2 - practical class, our instructor, Mr. Steven Chew, took time to inspect and prepare the PR1055X embroidery machine, which hadn’t been used for a while. Once everything was ready, he guided us through the essential setup steps—most notably, how to load and wind the bobbin thread
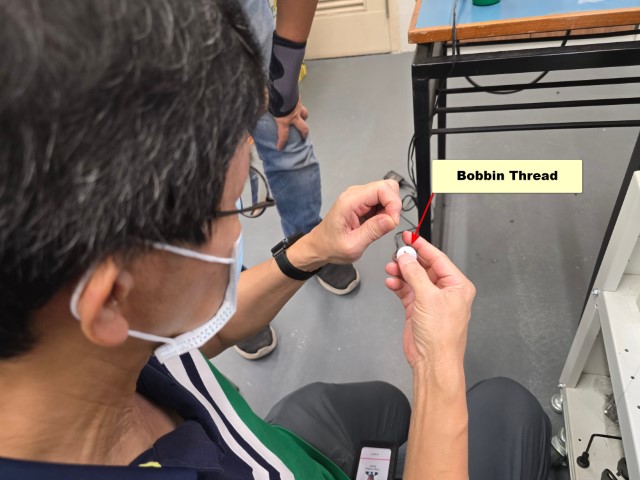
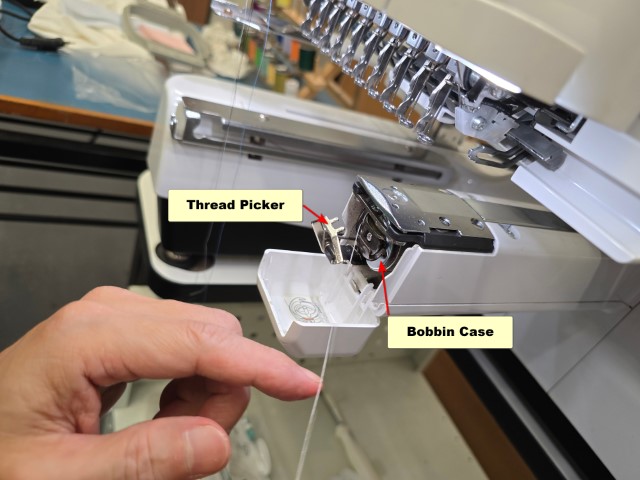
.Up next, Mr. Steven Chew show us how to route the threads from the “starting point” to the needle portion. Details on routing the thread: PR1055X Embroidery Machine Operational Manual (Pg. 82 to 86)
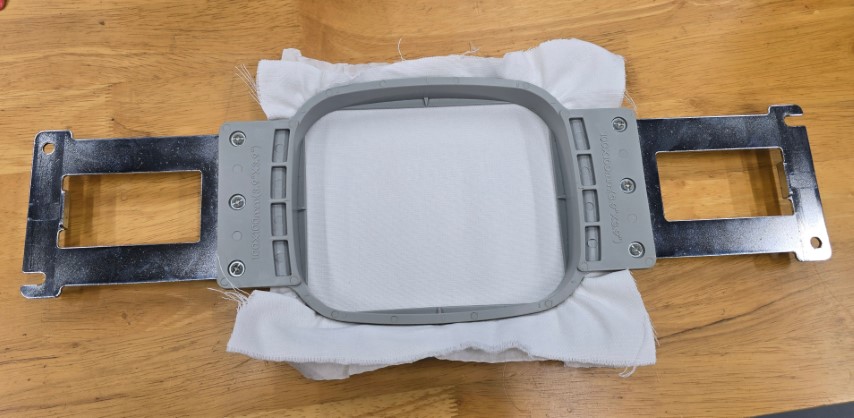
After ensuring all the threads are in position, we are going to check the threads’ tension by test run 1 simple image. We have prepared a 100mm x 100mm fabric with tear-away stabilizer for the run.
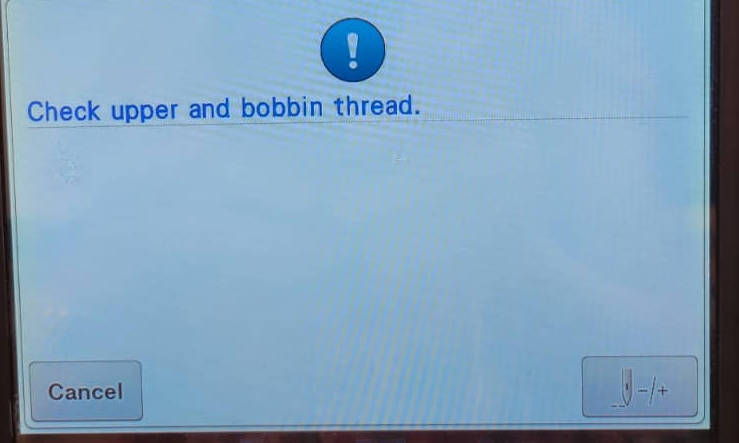
Theoretically, if the tension is good, you should not see any bobbin thread pulling up to the surface. If not, it will prompt the error below:
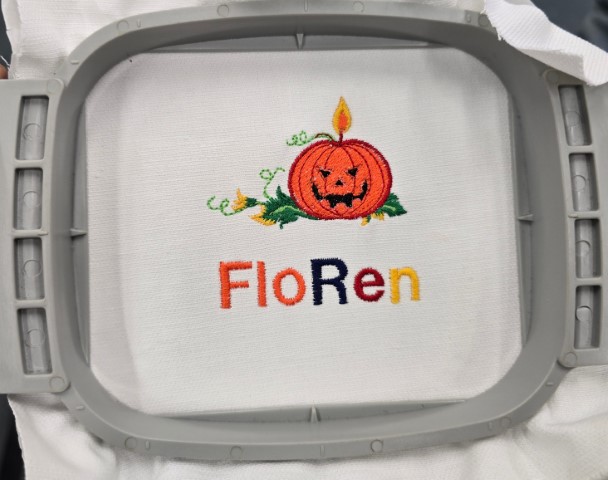
After a few troubleshooting, here is the final piece of the test run (a demo file plus an input text).
WORKFLOW
After the test run, I am going to make my very first embroidery that I have prepared earlier – the Barcelona Crest.
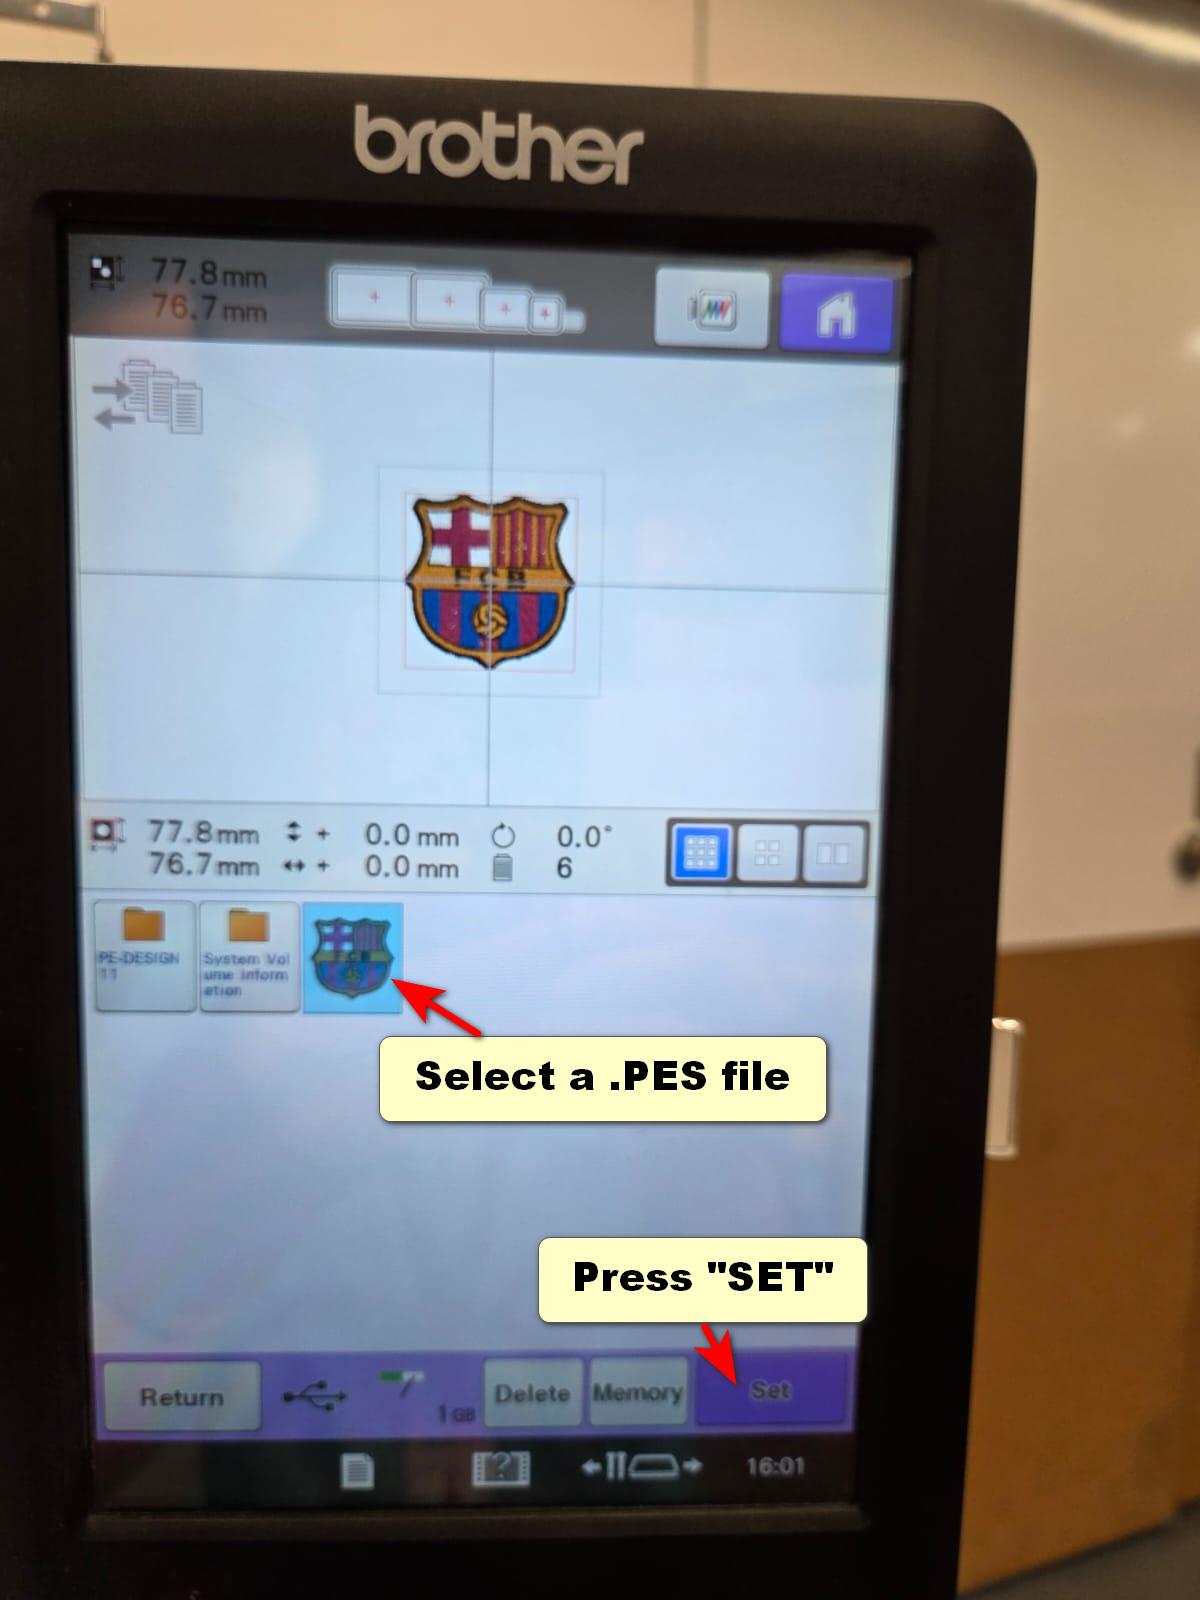
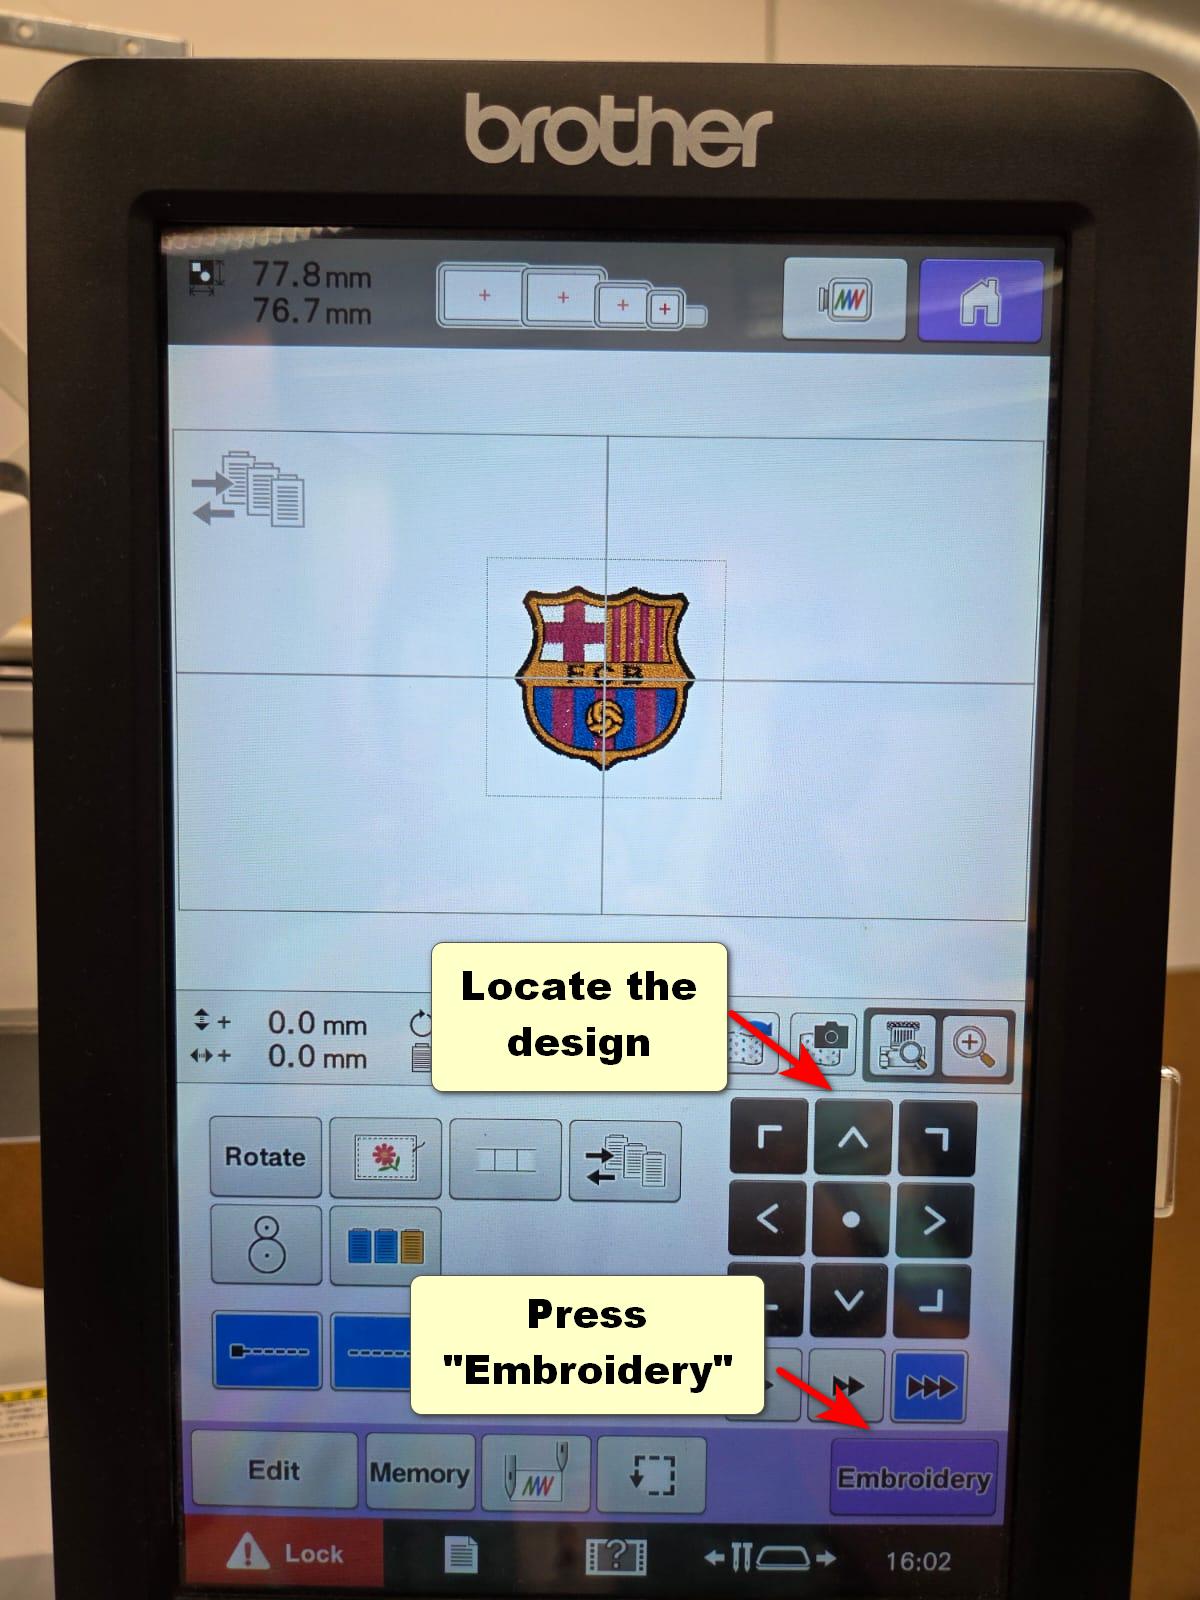
Steps: Load the PES file --> Select “EMBROIDERY” --> Proceed to “COLOUR” tab to select the correct colour shows on the spool stand.
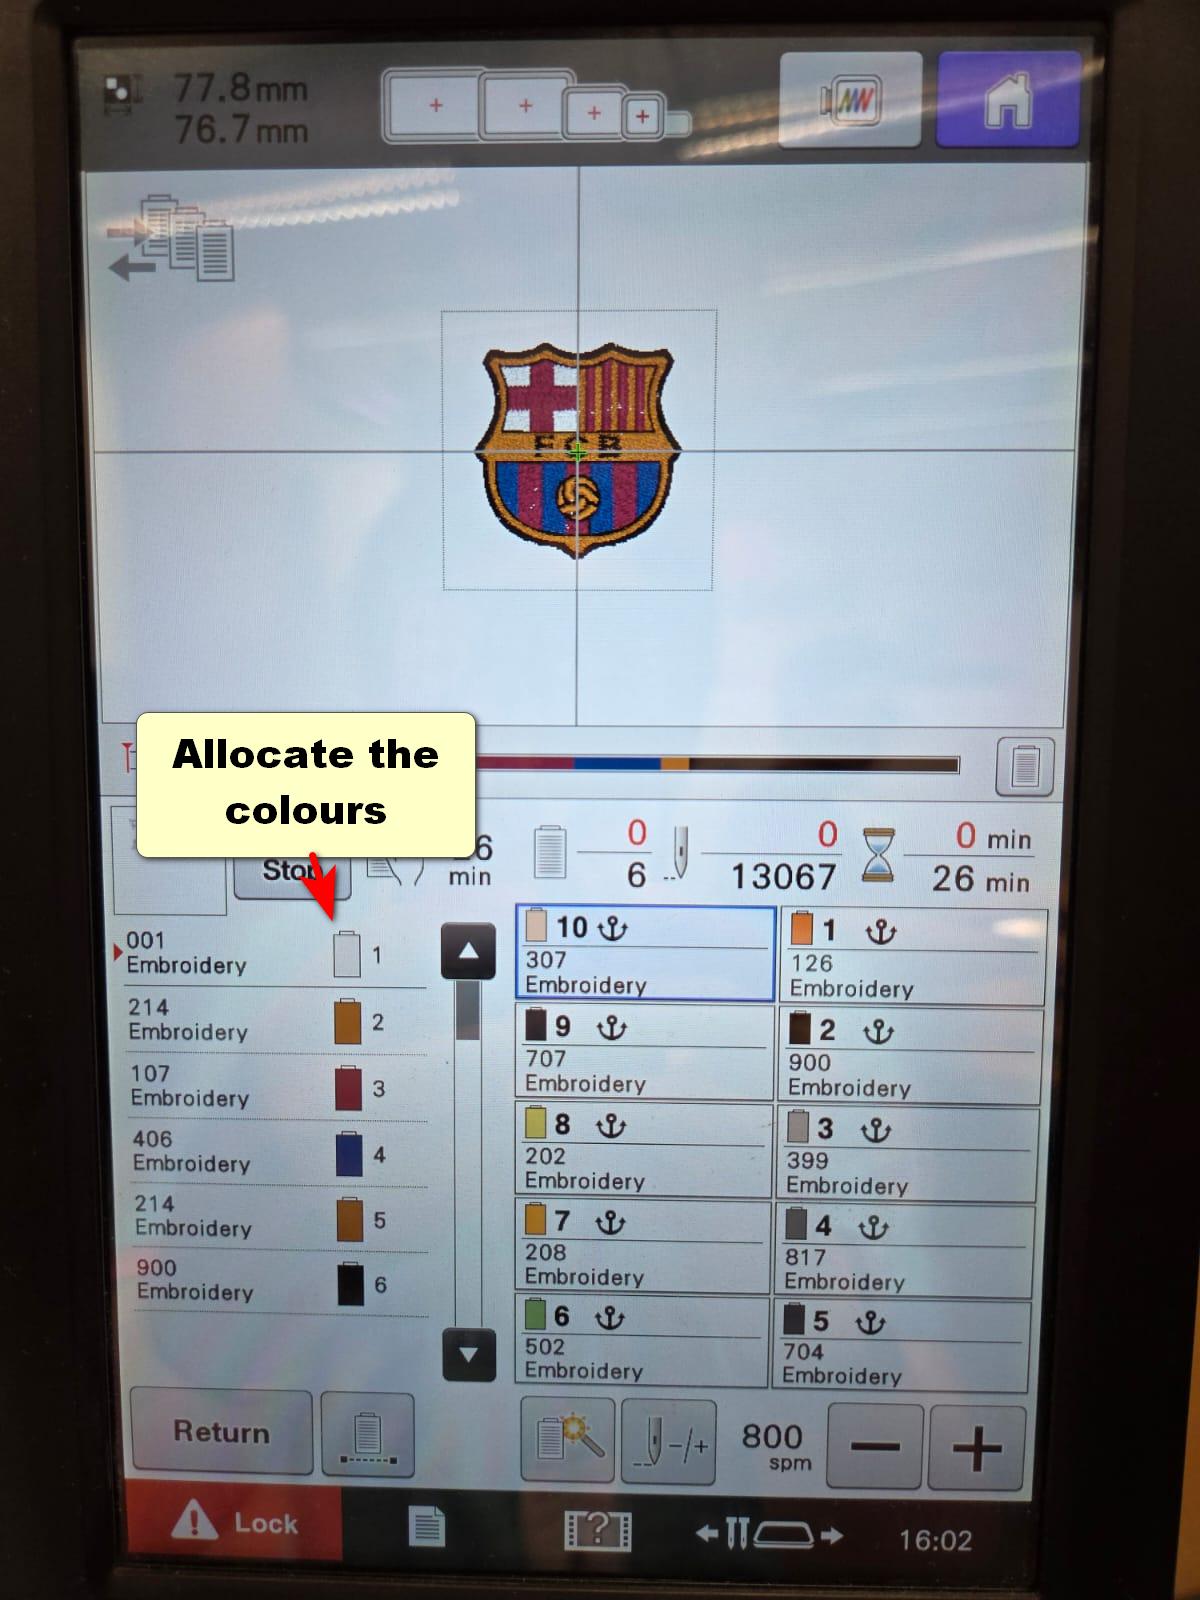
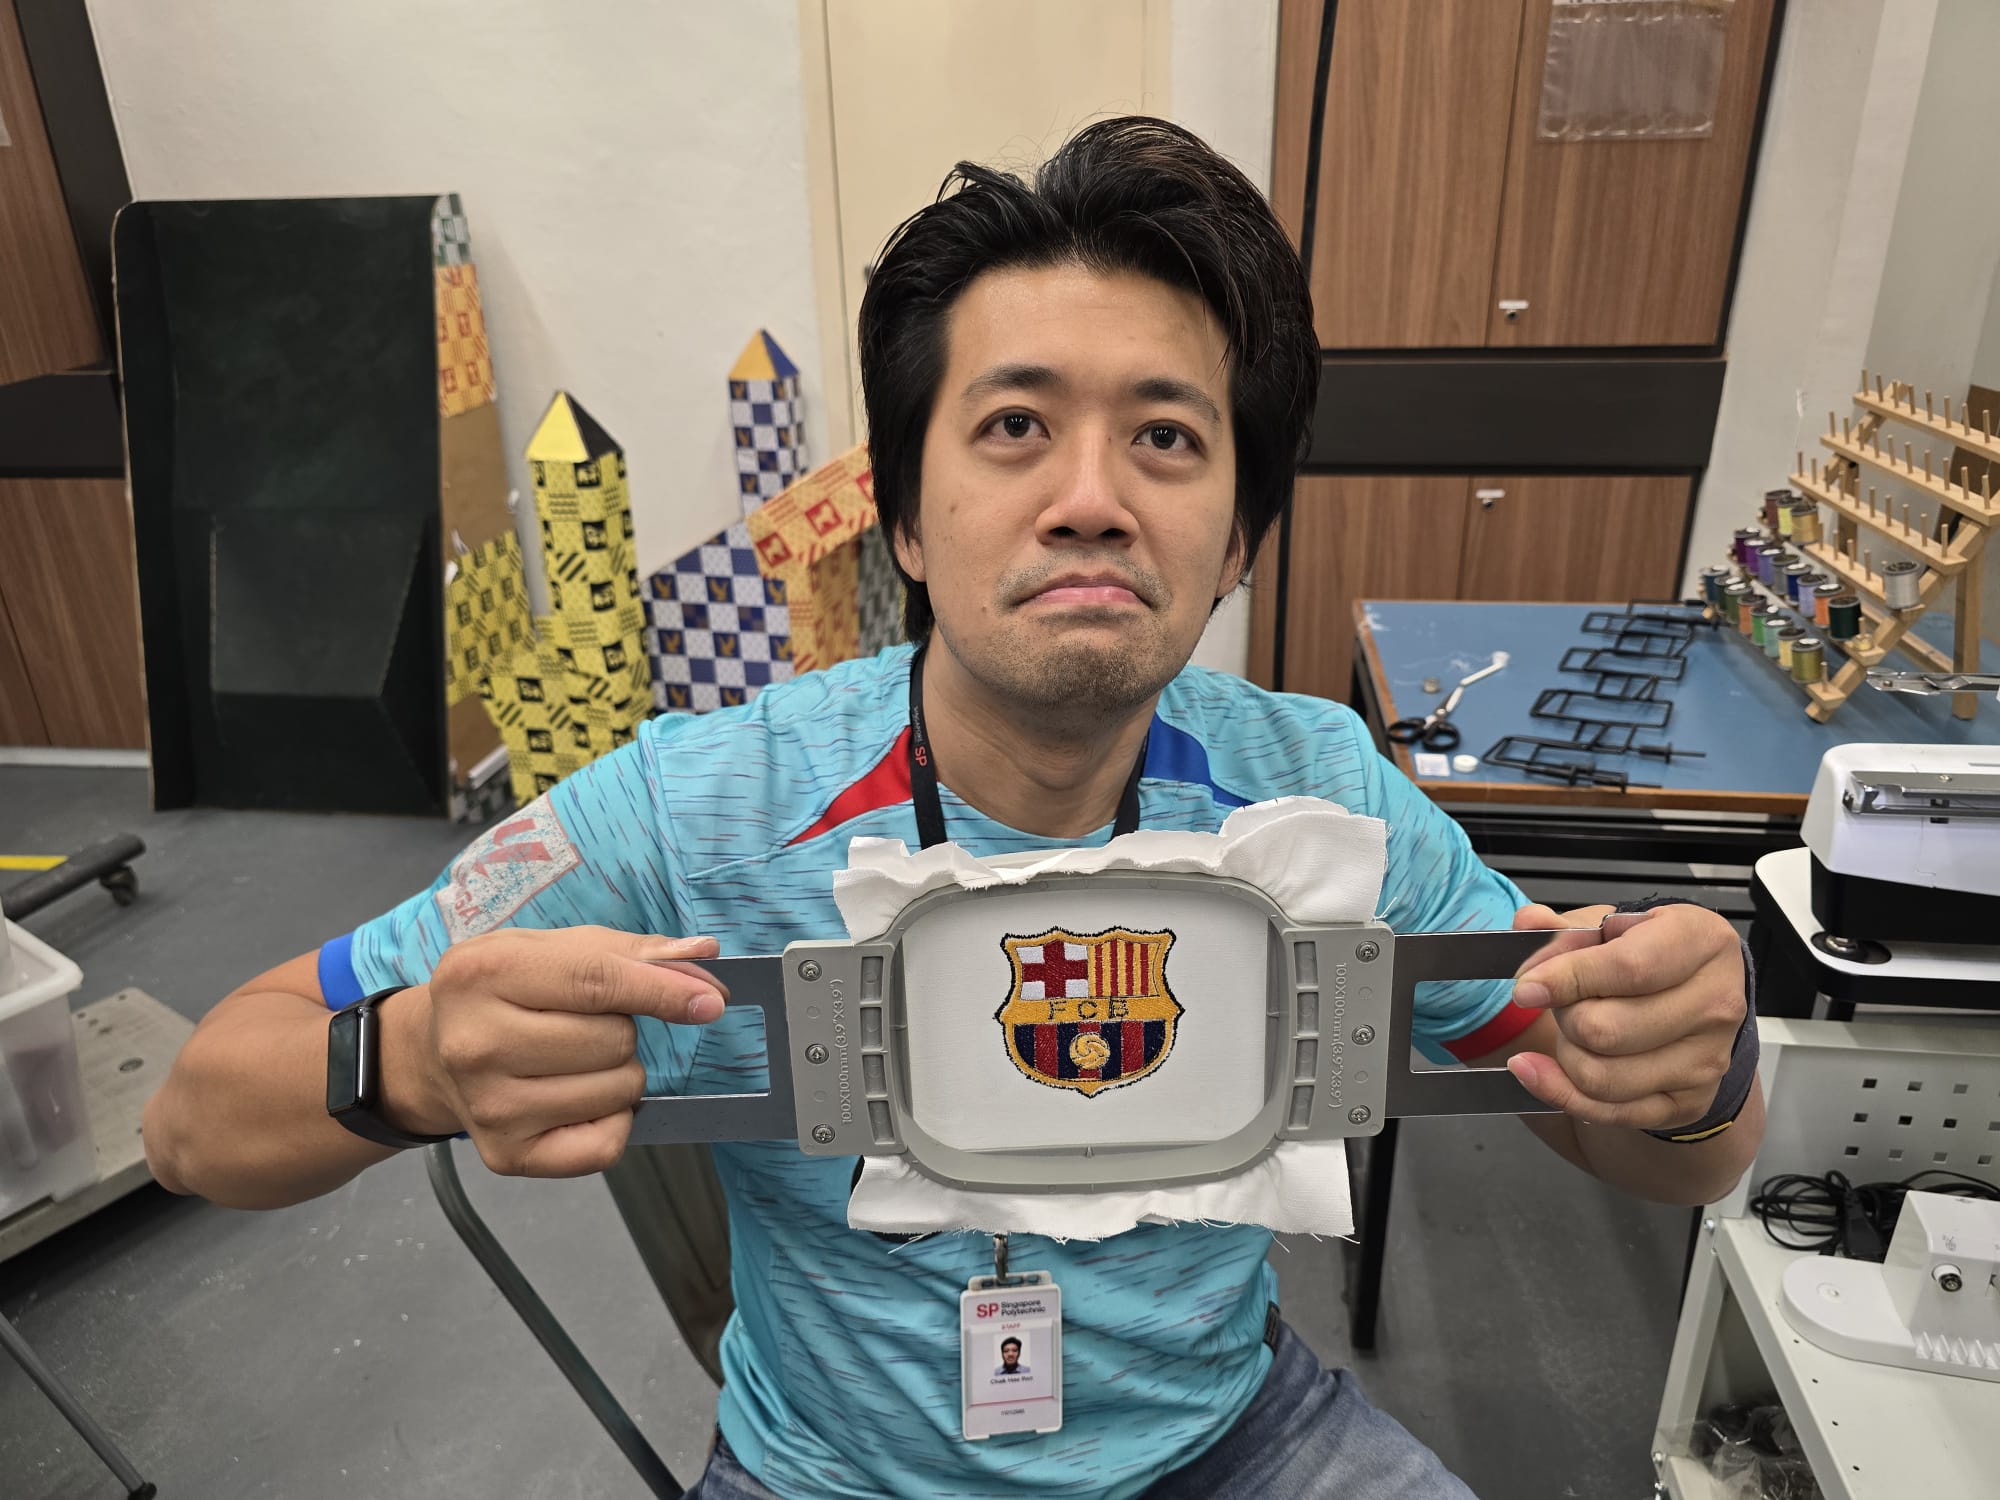
Once all colour settings are done, here is the making of the Barcelona Crest Embroidery.
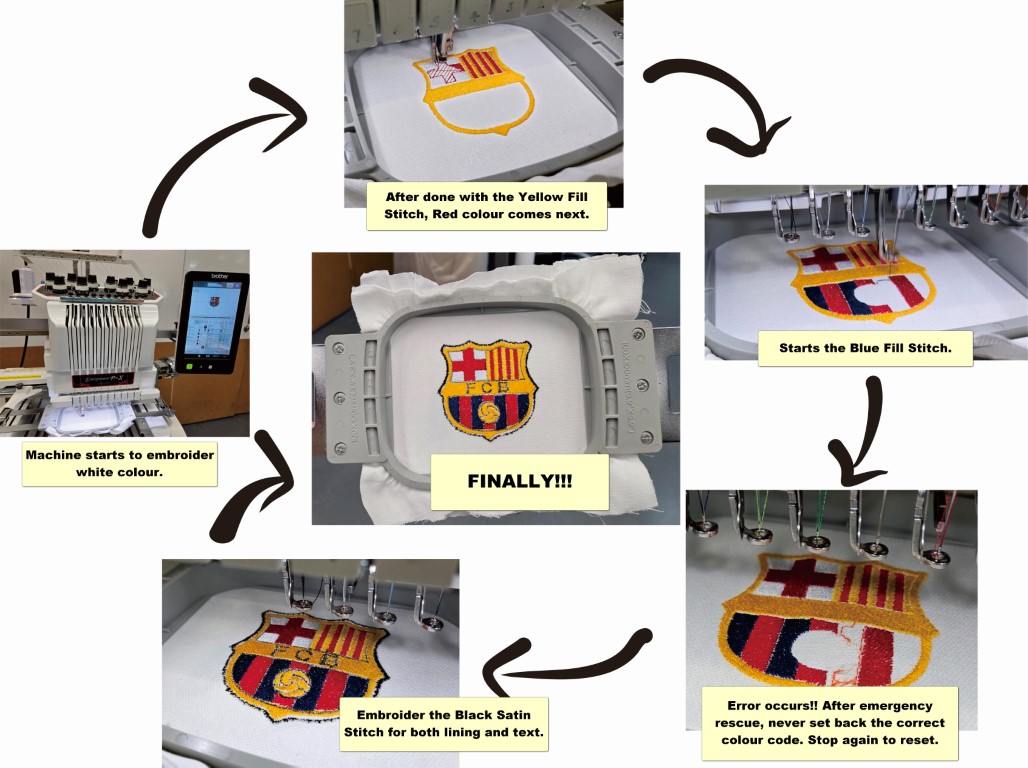
HERO SHOT for this week assignment!!!
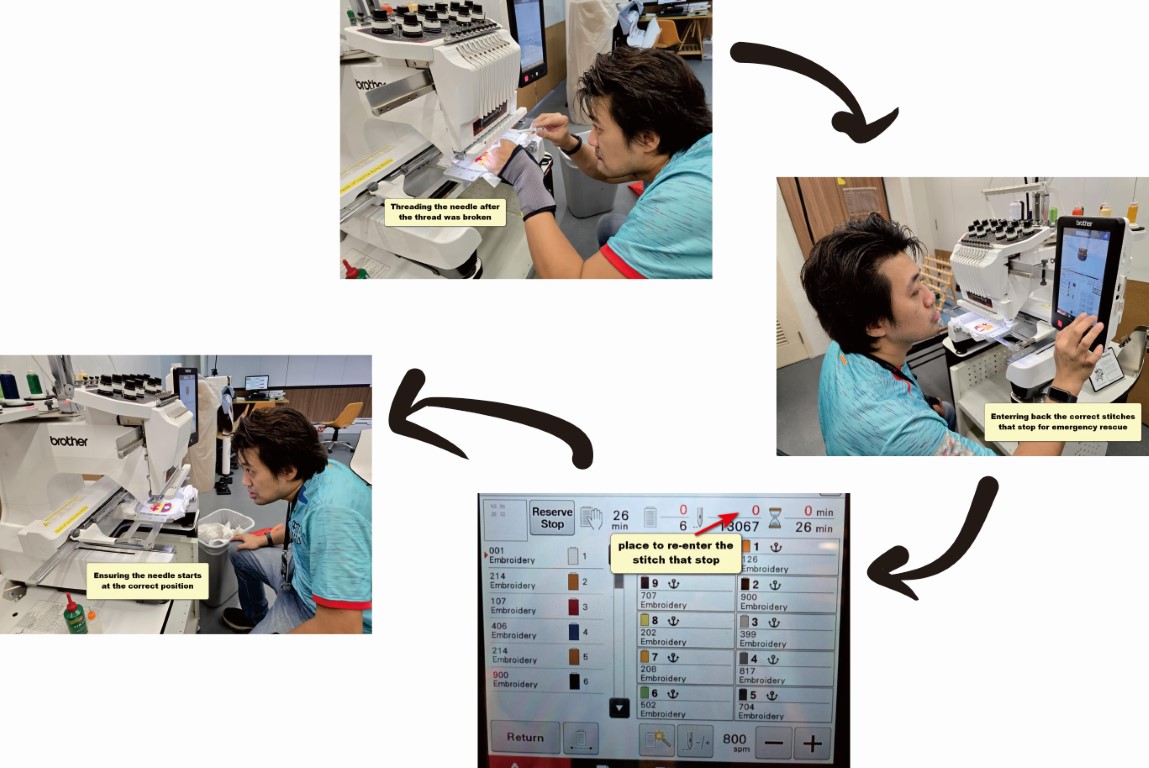
Reaching the final steps of the embroidery process wasn’t entirely smooth, as I encountered three issues along the way:
1) The bobbin thread ran out, and I had difficulty finding a replacement bobbin to continue the stitching process.
2) After inserting a new bobbin, the thread was too loose and vibrated inside the bobbin case. This led to excessive tension in the upper thread, causing the bobbin thread to bunch up and form a tangled mess beneath the fabric. It took a considerable amount of time to clear up the jam.
3) Due to the complications from the first two issues, the fabric became loose in the embroidery hoop, which resulted in misaligned stitches in the remaining parts of the design.
The useful steps to clear most of the errors before continue the process are:
Reflection
It was a week that I myself quite enjoy on it, especially the topic is what I am keen to learn on for my own personal usage. I would surely come back and come out with more designs after the I am done with the course.